

If you’ve ever raced back to camp after spotting some dark clouds roll in, you know what a relief it can be to ride out a storm from the safety and warmth of a tent. You may also know what complete frustration and misery it can be when your zipper gets stuck halfway while closing the flap (or worse, when you can’t pull on it at all).
Zippers are so common on everyday things – on a jacket, tents, luggage, a backpack, sleeping bags – that we don’t take the time to appreciate how sophisticated the anatomy of a zipper really is. That is, of course, until it gets stuck or broken on a beloved jacket or piece of camping equipment. Usually this happens when the zipper slider is missing or broken, meaning you can’t zip your gear either up or down, making it unusable.
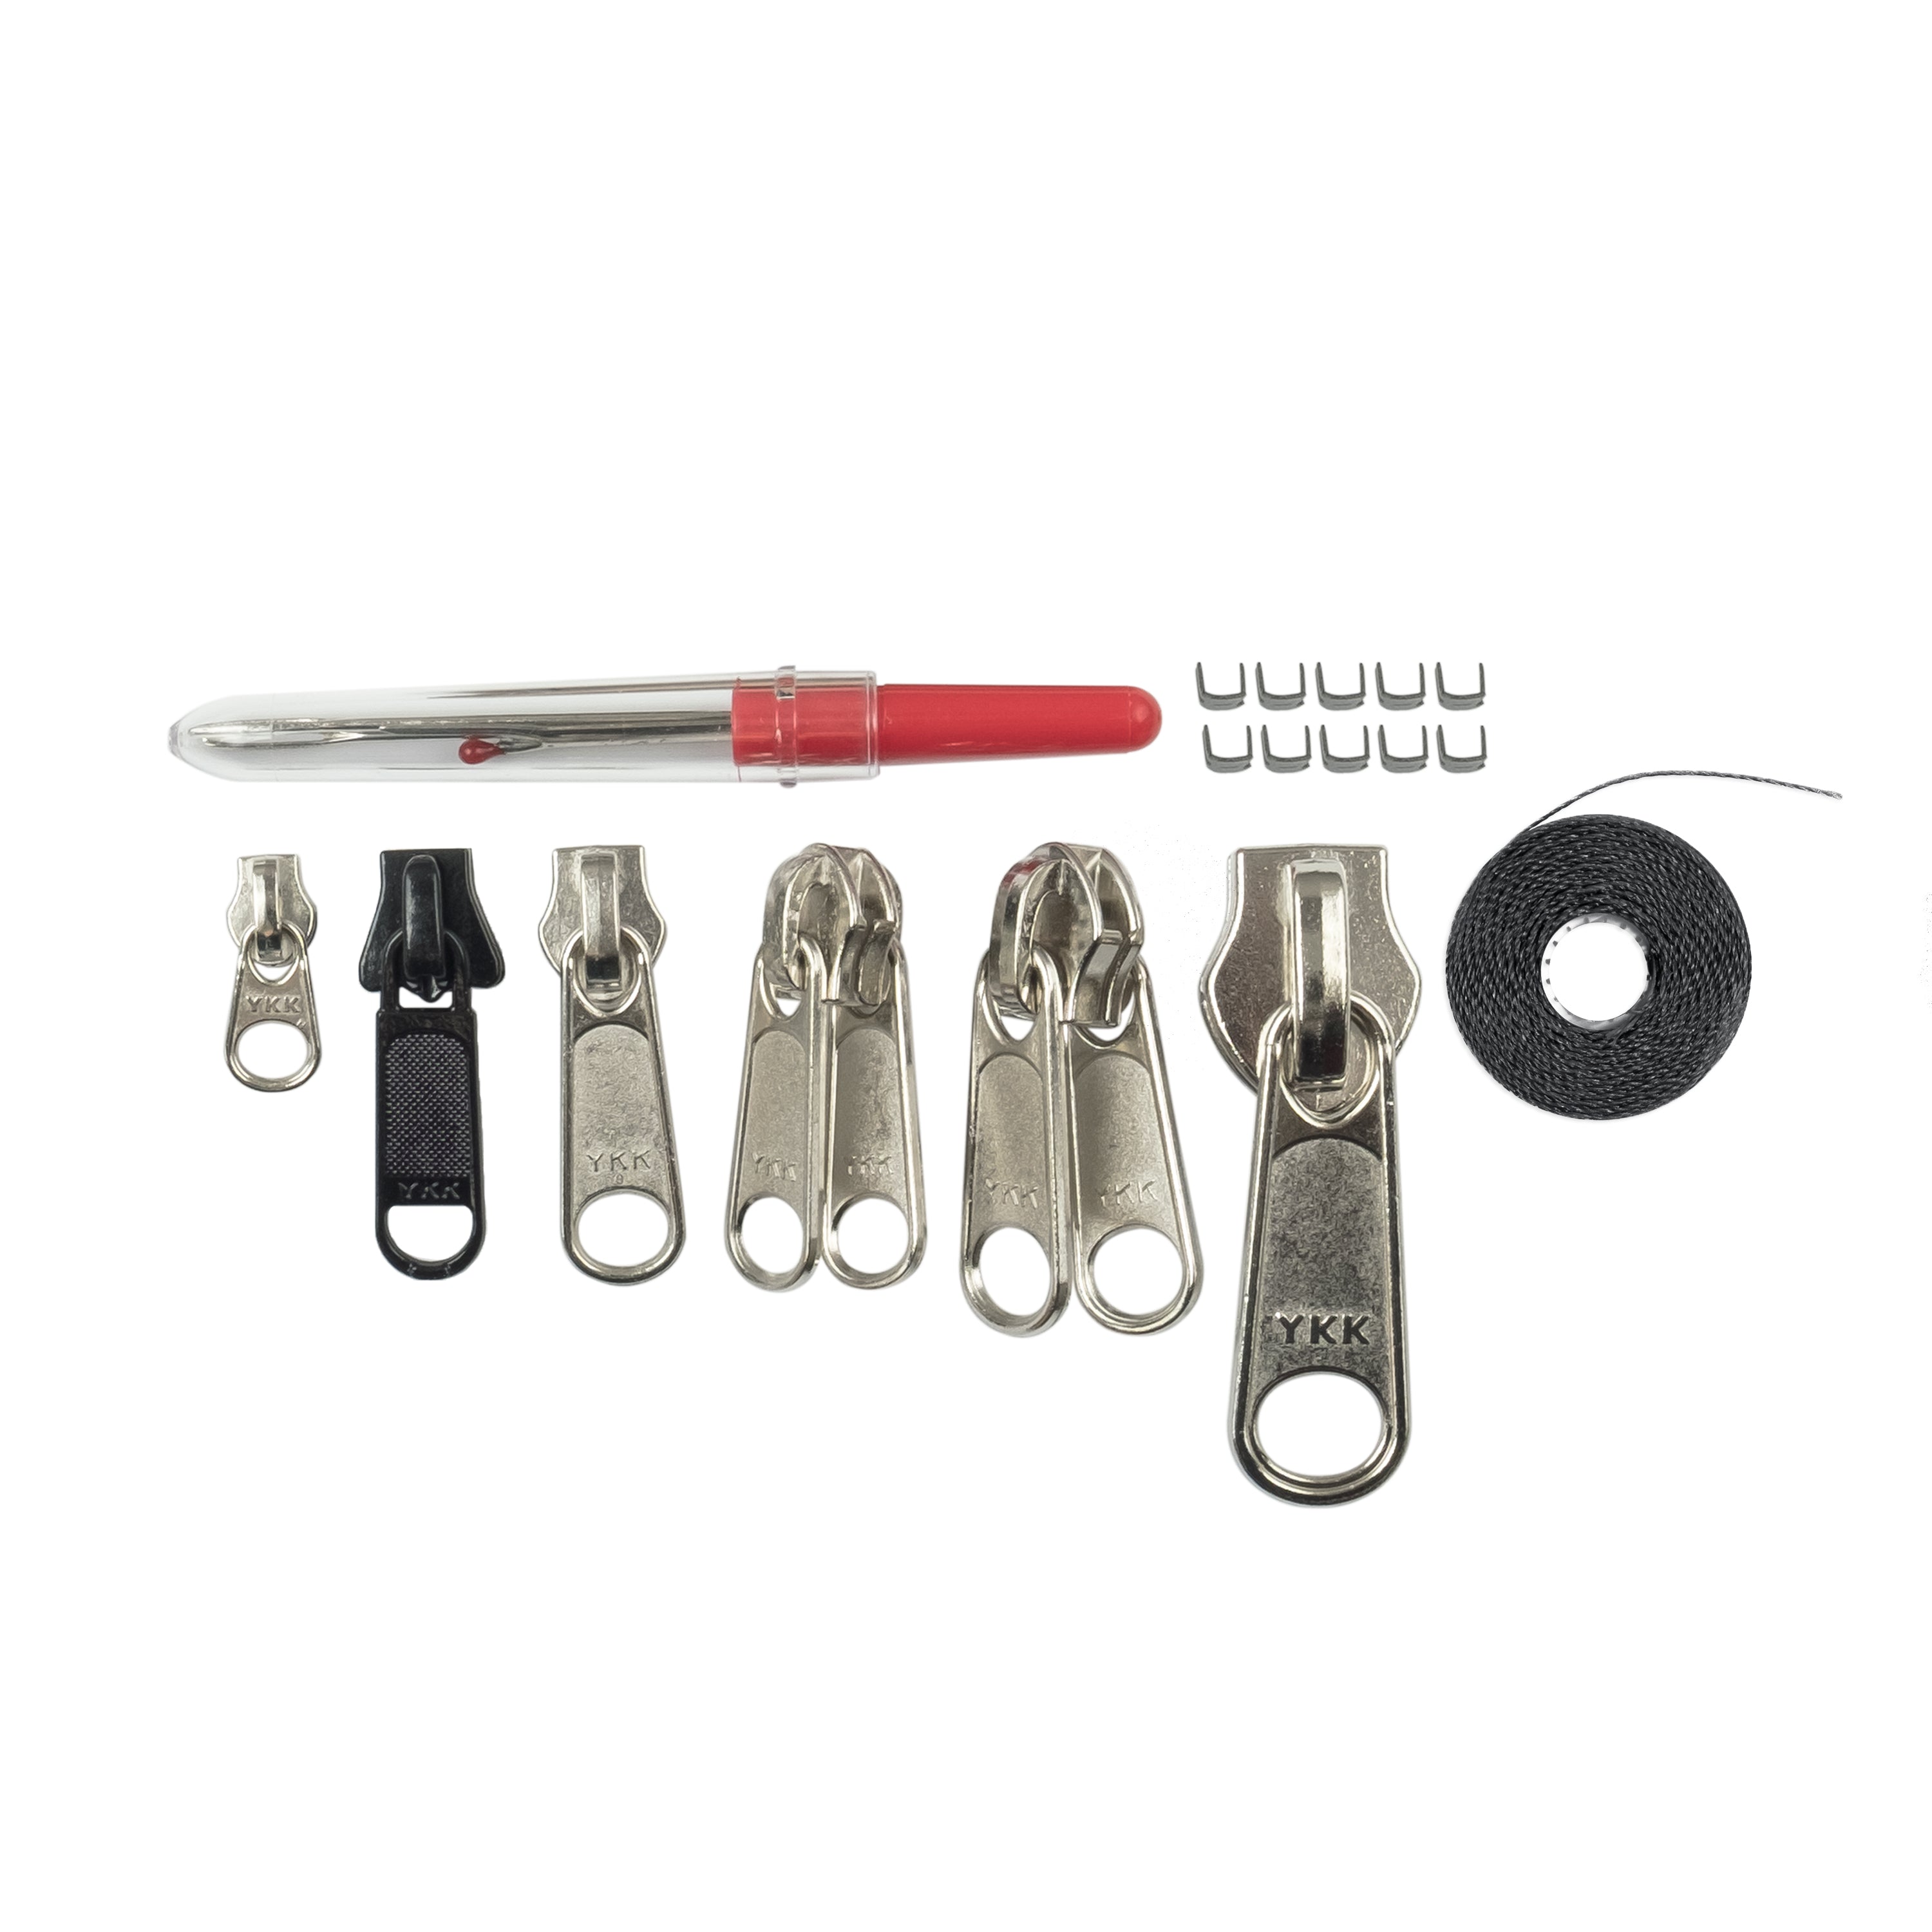
Although zippers are an ingenious feat of engineering, they are surprisingly simple to fix as long as you have the right tools. All you need to do is remove the broken zipper slider and replace it using our Zipper Repair Kit, which includes the most common zipper sizes along with all the sewing tools you’ll need. The key to getting replacement right the first time is to understand the type of zipper and size of zipper slider you’re working with.
There are two common types of zippers.
- Split with top stop, which are more common on jackets
- Closed-loop, which are fully sewn-in and found on luggage, bags and tents
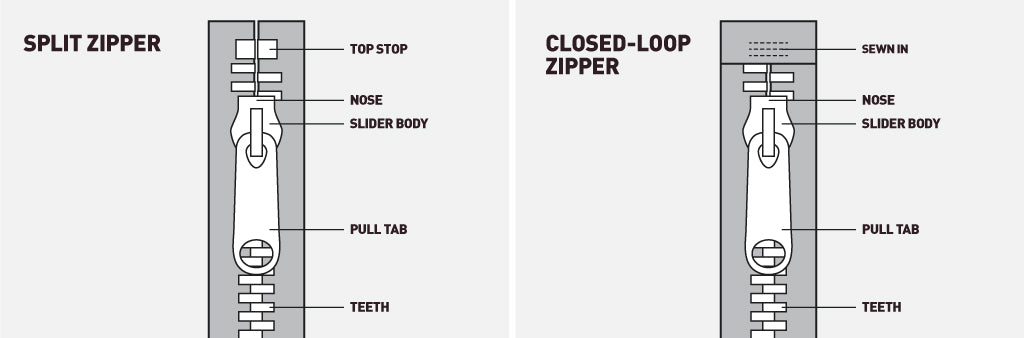
Zipper Anatomy:
The zipper slider size is located on the back or on the “nose” of the slider. If this information is missing, be sure to call the manufacturer to confirm the particular size. Typically, you’ll see these items with the following sizes:
- Jackets: size #3 and #5
- Tents, sleeping bags and other large gear: size #8 and #10

Want to learn how to repair zippers on everything from luggage to clothing to outdoor gear like sleeping bags and tents? Here’s how to handle this DIY with ease.
Zipper Slider Replacement on Split Zippers:
When your split zipper won’t pull in either direction on your jacket or bag, there’s no need to buy a whole new product—all you need to do is learn how to do a quick take-off and replace.

- Zipper Repair Kit
- Needle nose pliers (optional)
- Nippers (for plastic Vislon® zippers)
Estimated Time: 5 minutes
Step 1: Check the zipper for the correct slider replacement type and size in the Zipper Repair Kit.
Step 2: If there is a metal zipper stop present on the top of the zipper, remove it using needle nose pliers. If, however, it is a plastic Vislon zipper, you will need to cut the top stop off with nippers. When accessing the top of the zipper becomes difficult, use a seam ripper to remove fabric stitching.
Step 3: Remove the old zipper slider by moving it to the top of the zipper and sliding it off.
Step 4: Slide a new zipper from the top of the zipper, ensuring that the “nose” is facing up.
Step 5: Crimp a new zipper top stop on the top of the zipper using needle nose pliers.

Zipper Slider Replacement on Closed-Loop Zippers:
When the zipper slider is sewn in on a closed-loop zipper, the repair is slightly different than a top stop, but still repairable with some know-how and a Zipper Repair Kit.
- Zipper Repair Kit
- Pliers or multi-tool (optional)
Estimated time for the repair: About 20-30 minutes
Step 1: Like with a top stop repair, check the zipper for the correct type and size and then find the replacement zipper slider in the Zipper Repair Kit.
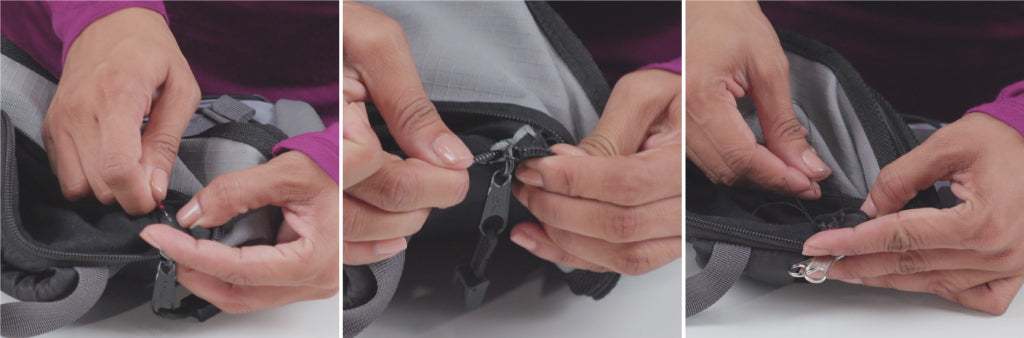
Step 2: Using the seam ripper in the repair kit, remove stitching on the lower end of the zipper.
Step 3: Remove the old zipper slider, and, if present, pry off the metal stop at the bottom of the zipper. Be careful not to tear the fabric at the base of the zipper teeth.
Step 4: Add in the new zipper slider, guiding the zipper teeth into the top grooves of the slider and pushing them through to the bottom of it. If you’re finding it difficult to push through, use a pin if needed.
Step 5: Pull on the zipper gently to ensure the slider is evenly set on the zipper tracks.
Step 6: Pull the slider up until you see that the track teeth appear locked at the bottom.
Step 7: Using needle and thread, sew in a new stop at the bottom of the zipper tracks.
Gear Tip: For dual-slider zippers, repeat this entire process to replace the second slider on the other sewn end of the zipper.


